Cloudflare has recently released the Upstash Integration for the Cloudflare Workers. This makes it even easier to use Upstash products on Workers. In this blog post, we're going use Upstash Redis integration to build a serverless URL shortener.
Getting Started
Here are the steps of building this project:
- Set up an Upstash database
- Create the Worker on Cloudflare
- Integrate Cloudflare Workers with Upstash
- Implement the project algorithm.
- Deploy your application
Creating the database
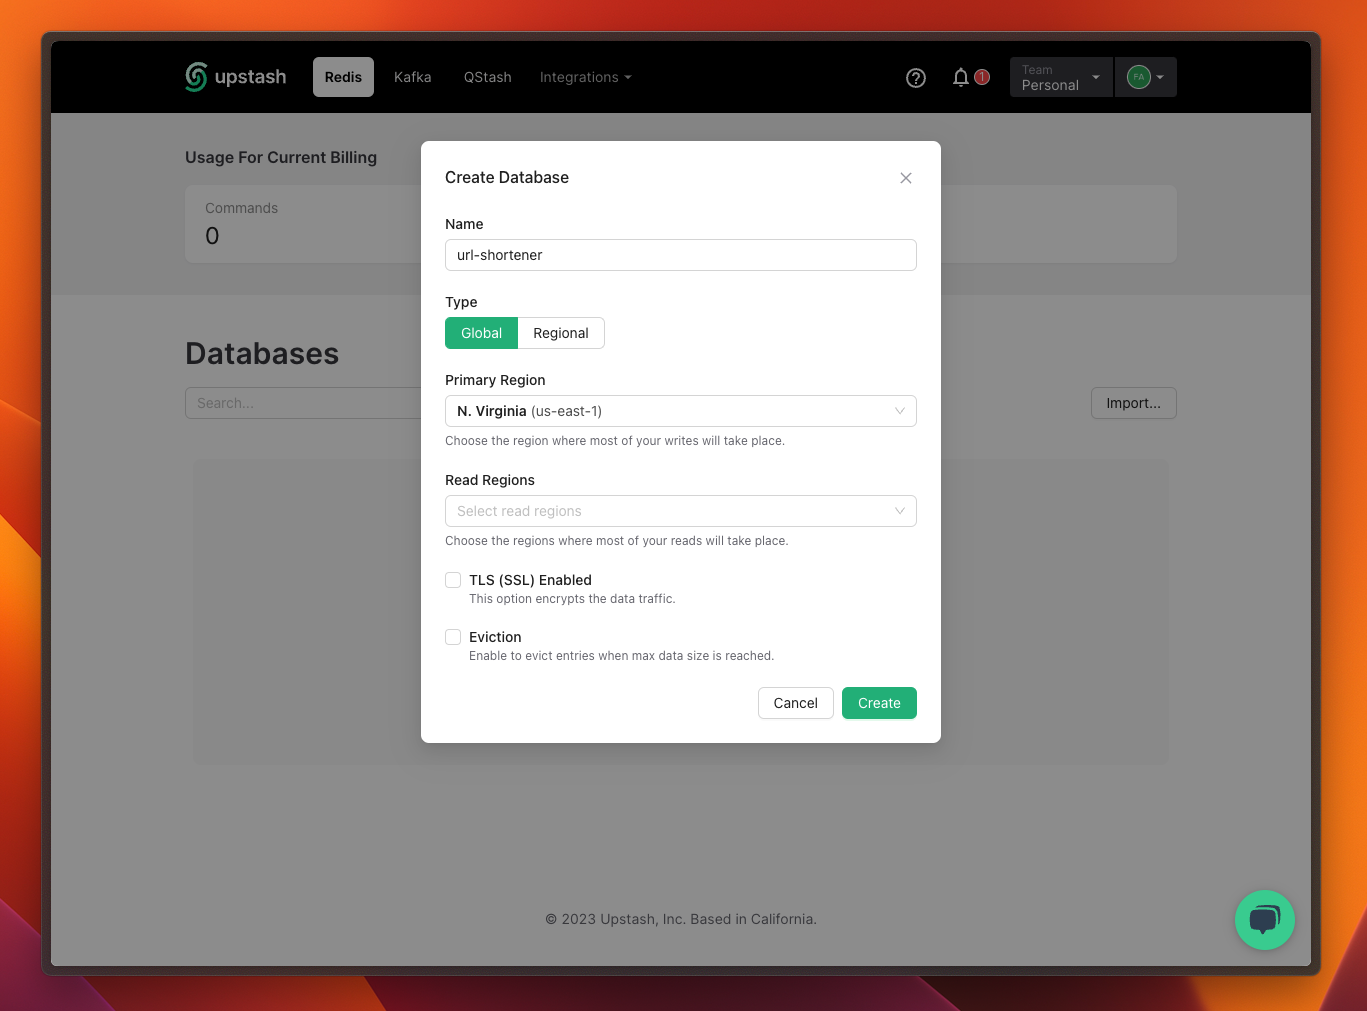
Navigate to Upstash console, and create yourself a Redis database by clicking the Create database button in the Redis section.

Just like that, your database is all set!
Creating the Cloudflare Worker
We're going to use the Cloudflare CLI tool to generate the Worker. It's a pretty simple process. Just open your terminal and type in the command below:
npm create cloudflare@latest
Executing this command will lead you through the options and configurations for the application. Finally, it will request you to log in to Cloudflare. Below is an example of my configuration and the resultant output:
$ npm create cloudflare@latest

using create-cloudflare version 2.1.0

╭ Create an application with Cloudflare Step 1 of 3
│
├ In which directory do you want to create your application?
│ dir ./url-shortener
│
├ What type of application do you want to create?
│ type "Hello World" Worker
│
├ Do you want to use TypeScript?
│ yes typescript
│
├ Copying files from "hello-world" template
│
├ Do you want to use TypeScript?
│ yes typescript
│
├ Retrieving current workerd compatibility date
│ compatibility date 2023-08-01
│
├ Do you want to use git for version control?
│ no git
│
╰ Application created

╭ Installing dependencies Step 2 of 3
│
├ Installing dependencies
│ installed via `npm install`
│
╰ Dependencies Installed

╭ Deploy with Cloudflare Step 3 of 3
│
├ Do you want to deploy your application?
│ yes deploy via `npm run deploy`
│
├ Logging into Cloudflare checking authentication status
│ not logged in
│
├ Logging into Cloudflare This will open a browser window
│ allowed via `wrangler login`
│
├ Selecting Cloudflare account retrieving accounts
│ account *******@upstash.com's Account
│
├ Deploying your application
│ deployed via `npm run deploy`
│
├  SUCCESS  View your deployed application at https://url-shortener.fahreddin.workers.dev
│
│ Navigate to the new directory cd url-shortener
│ Run the development server npm run start
│ Deploy your application npm run deploy
│ Read the documentation https://developers.cloudflare.com/workers
│ Stuck? Join us at https://discord.gg/cloudflaredev
│
├ Waiting for DNS to propagate
│ DNS propagation complete.
│
├ Waiting for deployment to become available
│ deployment is ready at: https://url-shortener.fahreddin.workers.dev
│
├ Opening browser
│
╰ See you again soon!
$ npm create cloudflare@latest
using create-cloudflare version 2.1.0
╭ Create an application with Cloudflare Step 1 of 3
│
├ In which directory do you want to create your application?
│ dir ./url-shortener
│
├ What type of application do you want to create?
│ type "Hello World" Worker
│
├ Do you want to use TypeScript?
│ yes typescript
│
├ Copying files from "hello-world" template
│
├ Do you want to use TypeScript?
│ yes typescript
│
├ Retrieving current workerd compatibility date
│ compatibility date 2023-08-01
│
├ Do you want to use git for version control?
│ no git
│
╰ Application created
╭ Installing dependencies Step 2 of 3
│
├ Installing dependencies
│ installed via `npm install`
│
╰ Dependencies Installed
╭ Deploy with Cloudflare Step 3 of 3
│
├ Do you want to deploy your application?
│ yes deploy via `npm run deploy`
│
├ Logging into Cloudflare checking authentication status
│ not logged in
│
├ Logging into Cloudflare This will open a browser window
│ allowed via `wrangler login`
│
├ Selecting Cloudflare account retrieving accounts
│ account *******@upstash.com's Account
│
├ Deploying your application
│ deployed via `npm run deploy`
│
├ SUCCESS View your deployed application at https://url-shortener.fahreddin.workers.dev
│
│ Navigate to the new directory cd url-shortener
│ Run the development server npm run start
│ Deploy your application npm run deploy
│ Read the documentation https://developers.cloudflare.com/workers
│ Stuck? Join us at https://discord.gg/cloudflaredev
│
├ Waiting for DNS to propagate
│ DNS propagation complete.
│
├ Waiting for deployment to become available
│ deployment is ready at: https://url-shortener.fahreddin.workers.dev
│
├ Opening browser
│
╰ See you again soon!We've created and deployed the application using a single line command. This command should have initialized a folder similar to this:
src
└── worker.ts
node_modules
package-lock.json
package.json
tsconfig.json
wrangler.tomlsrc
└── worker.ts
node_modules
package-lock.json
package.json
tsconfig.json
wrangler.tomlEnabling Upstash integration will be equally straightforward.
Cloudflare - Upstash Integration
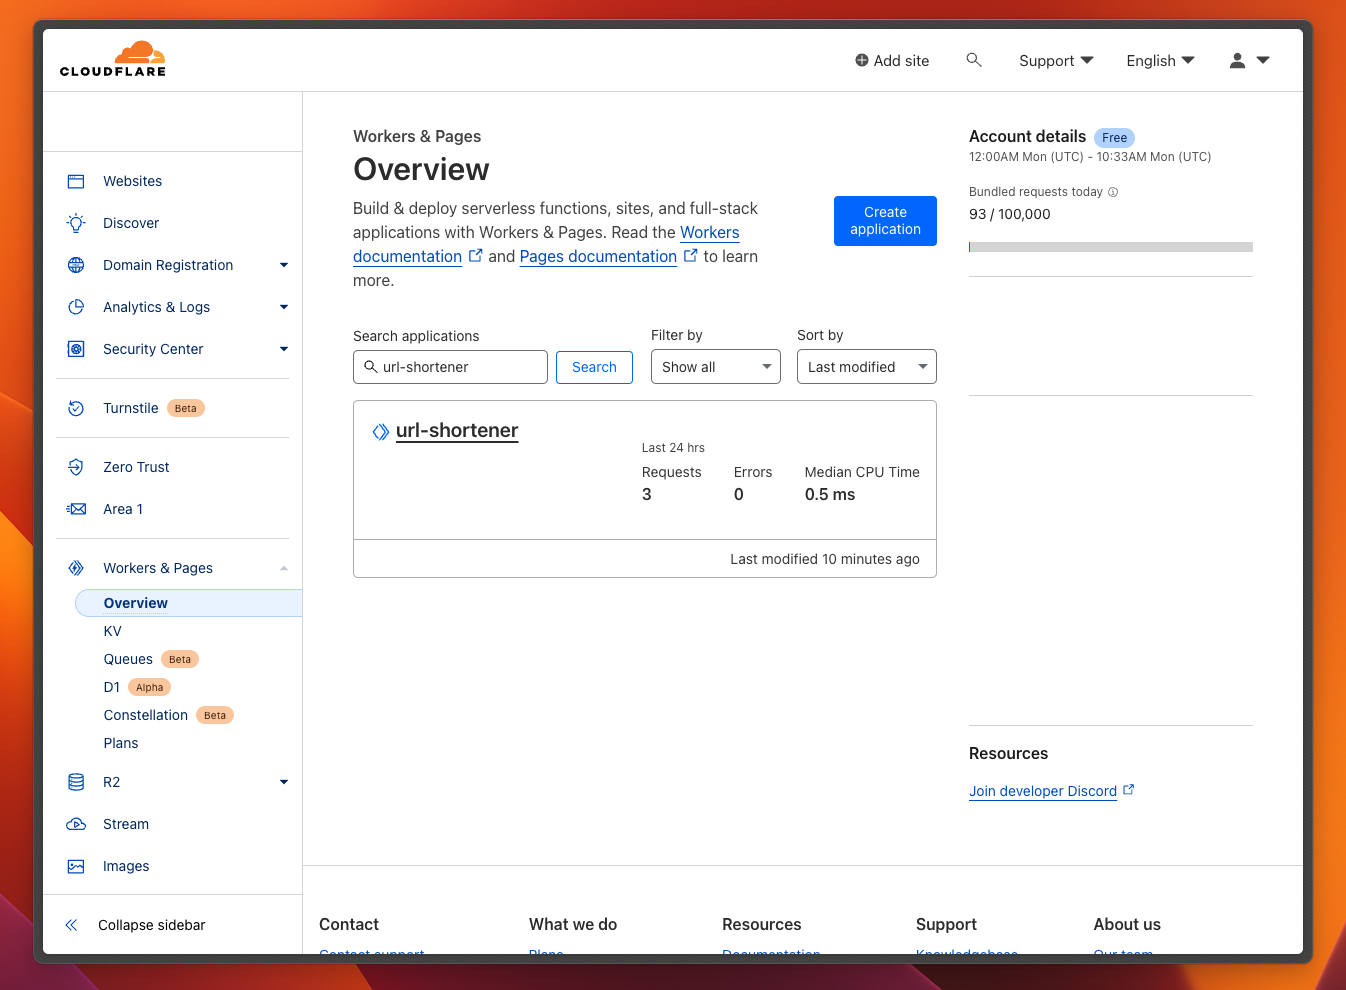
Access to the Cloudflare Dashboard and login with the same account that you've created the url-shortener application. Then, navigate to the Workers & Pages > Overview section of the sidebar. Here, you will find the url-shortener application listed.

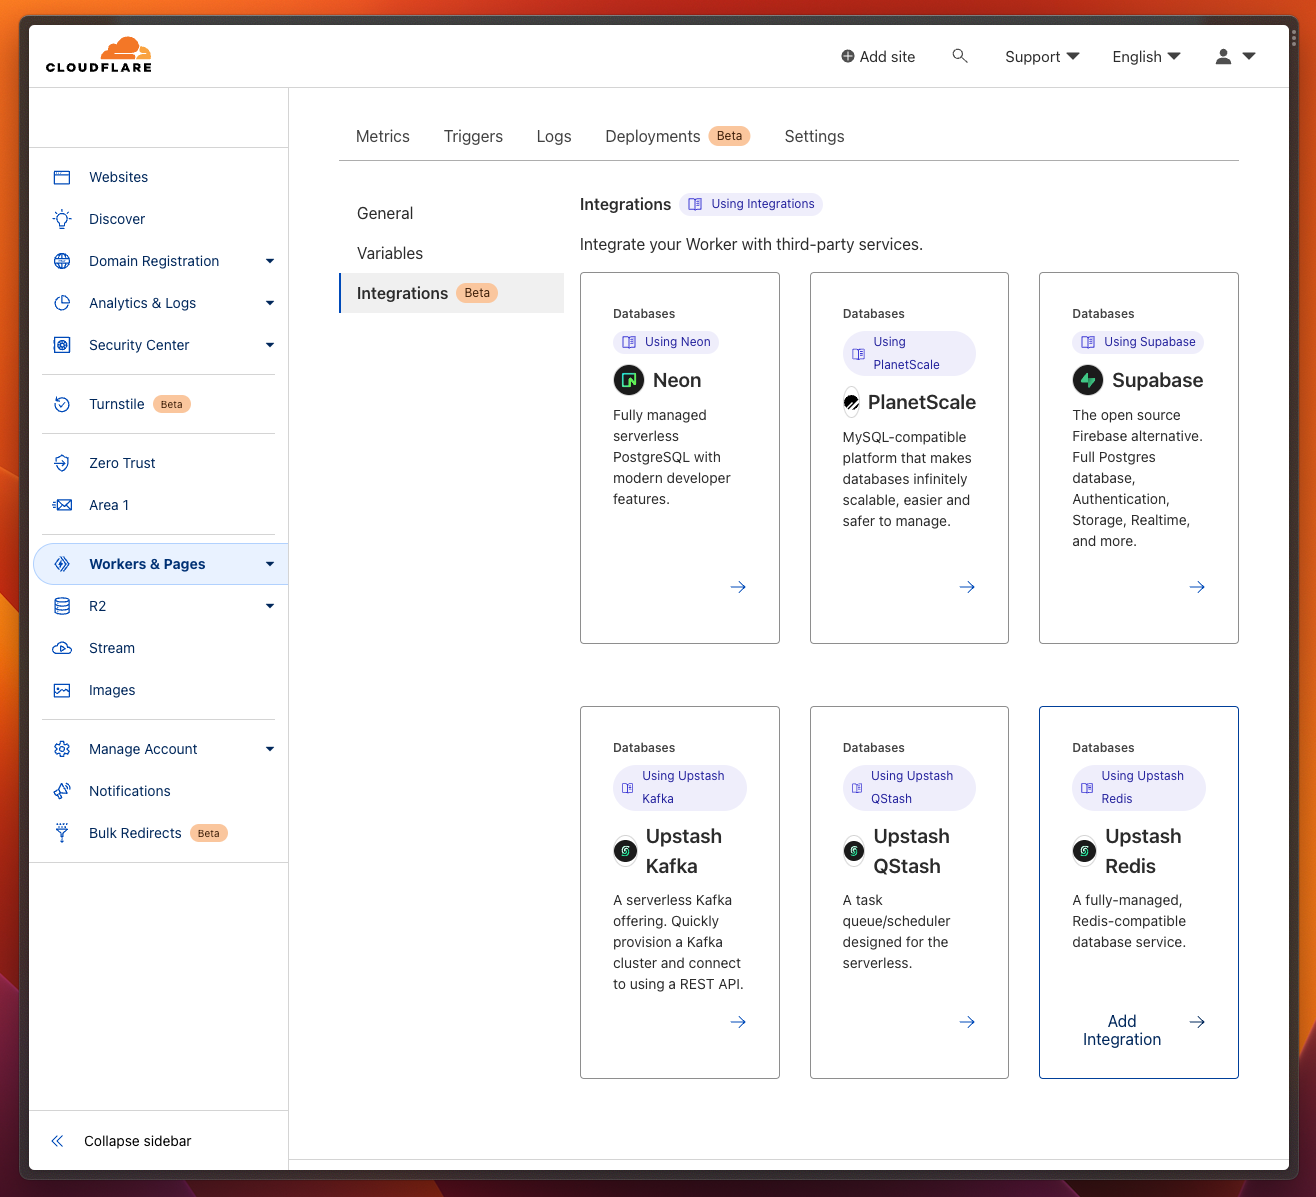
Clicking on the application will direct you to the application details page, where we will perform the integration process. Switch to the Settings tab in the application details, and proceed to Integrations section. You will see various Worker integrations listed. To proceed, click the Add Integration button associated with the Upstash Redis.

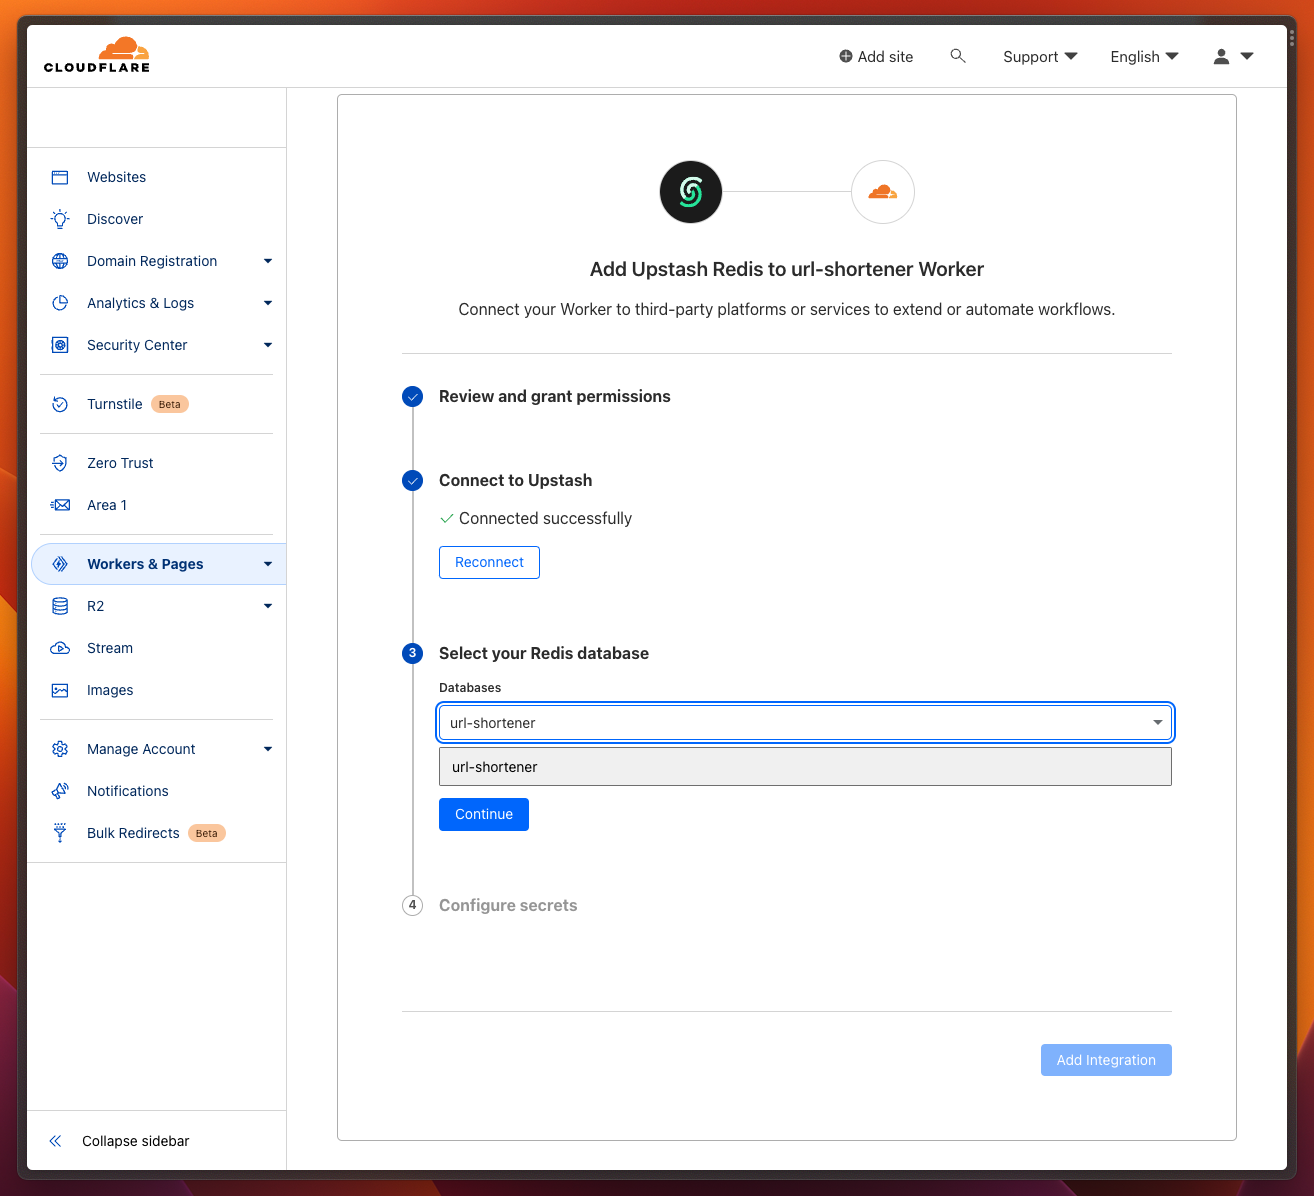
On the Integration page, connect to your Upstash account. Then, select the url-shortener database from the dropdown menu. Finalize the process by pressing Save button.
Note: Please don't make any changes in the secret names on the Configure secrets step. These credentials will be automatically picked up by Redis.fromEnv(env) line in the code as UPSTASH_REDIS_REST_URL and UPSTASH_REDIS_REST_TOKEN.

Implementing URL Shortener
Our implementation will rather be a simple one. It will have two functionalities:
-
When a URL is sent using the POST method, a randomly generated key will be assigned to that URL. This key-URL pair will be stored in Redis for retrieval. The key will be appended as a path to the Worker URL and sent to the user in the
<YOUR_WORKER_URL>/<KEY>format. -
When user accesses the Worker URL with previously added key as a path, corresponding value of the key will be retrieved from Redis. The user will then be redirected to this URL with a
307response code.
We will implement the application in the src/worker.ts file. Below is the basic implementation of our URL Shortener:
import { Redis } from "@upstash/redis/cloudflare";

export interface Env {
  UPSTASH_REDIS_REST_URL: string;
  UPSTASH_REDIS_REST_TOKEN: string;
}

export default {
  async fetch(
    request: Request,
    env: Env,
    ctx: ExecutionContext,
  ): Promise<Response> {
    const redis = Redis.fromEnv(env);

    /*
        generateRandomKey function returns a 7 digit alphanumerical key.
		If an identical key exists in Redis, it will create new key.
		*/
    async function generateRandomKey(): Promise<string> {
      const key: string = btoa(
        crypto.getRandomValues(new Uint8Array(2)).toString(),
      ).replaceAll("=", "");
      if (await redis.exists(key)) {
        return generateRandomKey();
      }
      return key;
    }

    /*
		If the request method is POST, "longUrl" field will be extracted from
          the request body and new key will be generated for this url.
        Then, this key-value pair will be persisted to Redis.
		*/
    if (request.method === "POST") {
      const requestUrl = request.url;
      const body = await request.text();
      const { longUrl } = JSON.parse(body);
      const key = await generateRandomKey();
      redis.set(key, longUrl);

      const responseUrl = requestUrl + key;
      return new Response(responseUrl);
    }

    const slug: string = request.url.split("/").pop() || "";
    const url = (await redis.get(slug)) as string;

    /*
		If the slug exists in the Redis DB as key, user will be redirected to URL in the value.
	    If the slug doesn't exist in the Redis, or it doesn't exist at all,
          an error will be returned.
	    */
    if (url) {
      return Response.redirect(url, 307);
    } else {
      const errorText = !slug
        ? "Please provide a slug."
        : `Slug ${slug} not found. `;

      return new Response(errorText, { status: 404 });
    }
  },
};import { Redis } from "@upstash/redis/cloudflare";
export interface Env {
UPSTASH_REDIS_REST_URL: string;
UPSTASH_REDIS_REST_TOKEN: string;
}
export default {
async fetch(
request: Request,
env: Env,
ctx: ExecutionContext,
): Promise<Response> {
const redis = Redis.fromEnv(env);
/*
generateRandomKey function returns a 7 digit alphanumerical key.
If an identical key exists in Redis, it will create new key.
*/
async function generateRandomKey(): Promise<string> {
const key: string = btoa(
crypto.getRandomValues(new Uint8Array(2)).toString(),
).replaceAll("=", "");
if (await redis.exists(key)) {
return generateRandomKey();
}
return key;
}
/*
If the request method is POST, "longUrl" field will be extracted from
the request body and new key will be generated for this url.
Then, this key-value pair will be persisted to Redis.
*/
if (request.method === "POST") {
const requestUrl = request.url;
const body = await request.text();
const { longUrl } = JSON.parse(body);
const key = await generateRandomKey();
redis.set(key, longUrl);
const responseUrl = requestUrl + key;
return new Response(responseUrl);
}
const slug: string = request.url.split("/").pop() || "";
const url = (await redis.get(slug)) as string;
/*
If the slug exists in the Redis DB as key, user will be redirected to URL in the value.
If the slug doesn't exist in the Redis, or it doesn't exist at all,
an error will be returned.
*/
if (url) {
return Response.redirect(url, 307);
} else {
const errorText = !slug
? "Please provide a slug."
: `Slug ${slug} not found. `;
return new Response(errorText, { status: 404 });
}
},
};Now that our algorithm is ready, there's only one step left: deploying the application. Navigate to url-shortener folder from the terminal, and run the command below:
npm run deploynpm run deployOur Cloudflare Worker is now up and running! You can test it either in the application dashboard, or via a curl request. Here's an example request for you. You can replace the URL with your Worker URL, or test with my implementation:
curl -X POST https://url-shortener.fahreddin.workers.dev \
	-d '{ "longUrl" : "https://google.com" }'
curl -X POST https://url-shortener.fahreddin.workers.dev \
-d '{ "longUrl" : "https://google.com" }'Clicking on the response URL will redirect you to https://google.com.
Conclusion
Thank you for following along the tutorial!
As you've discovered, the combination of serverless functions and the power of Upstash Redis opens up a world of possibilities for your projects. The versatility and efficiency of this pair empower you to create solutions that are not only innovative but also remarkably responsive.
Remember, this guide is just the beginning. There's no limit to how you can expand and improve this project.
Should any questions or problems, feel free to reach out to me at fahreddin@upstash.com.
Happy coding!
